
How to Add a New Location
-
1
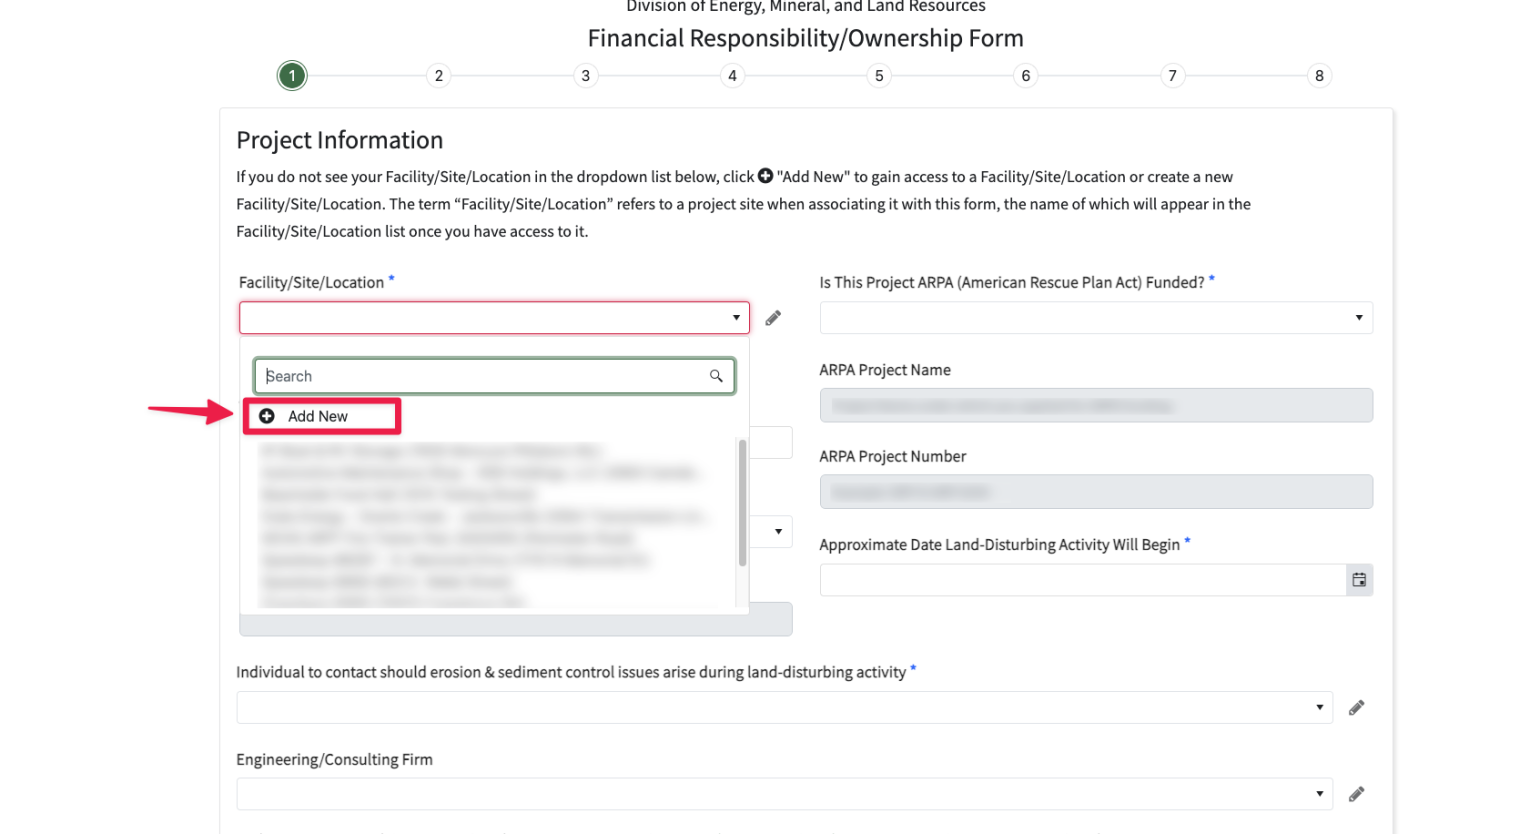
Navigate to the application
From the Facility/Location/Site listbox, click on the "+ Add New" icon.
-
2
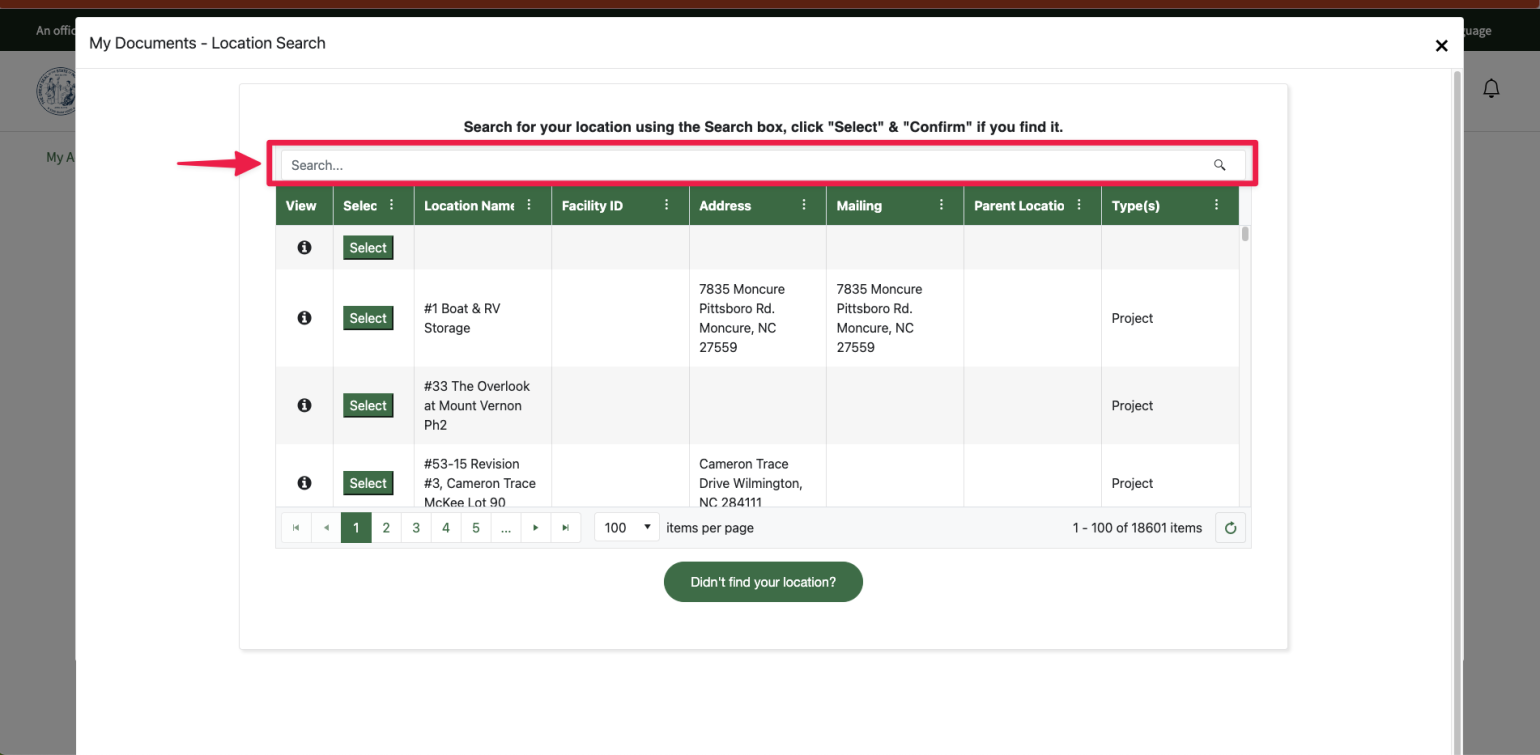
Search for the location
Search in the table grid for your facility/site/location by typing a value in the search box at the top of the grid. Make sure you try a few search strings before proceeding to the next step.
-
3
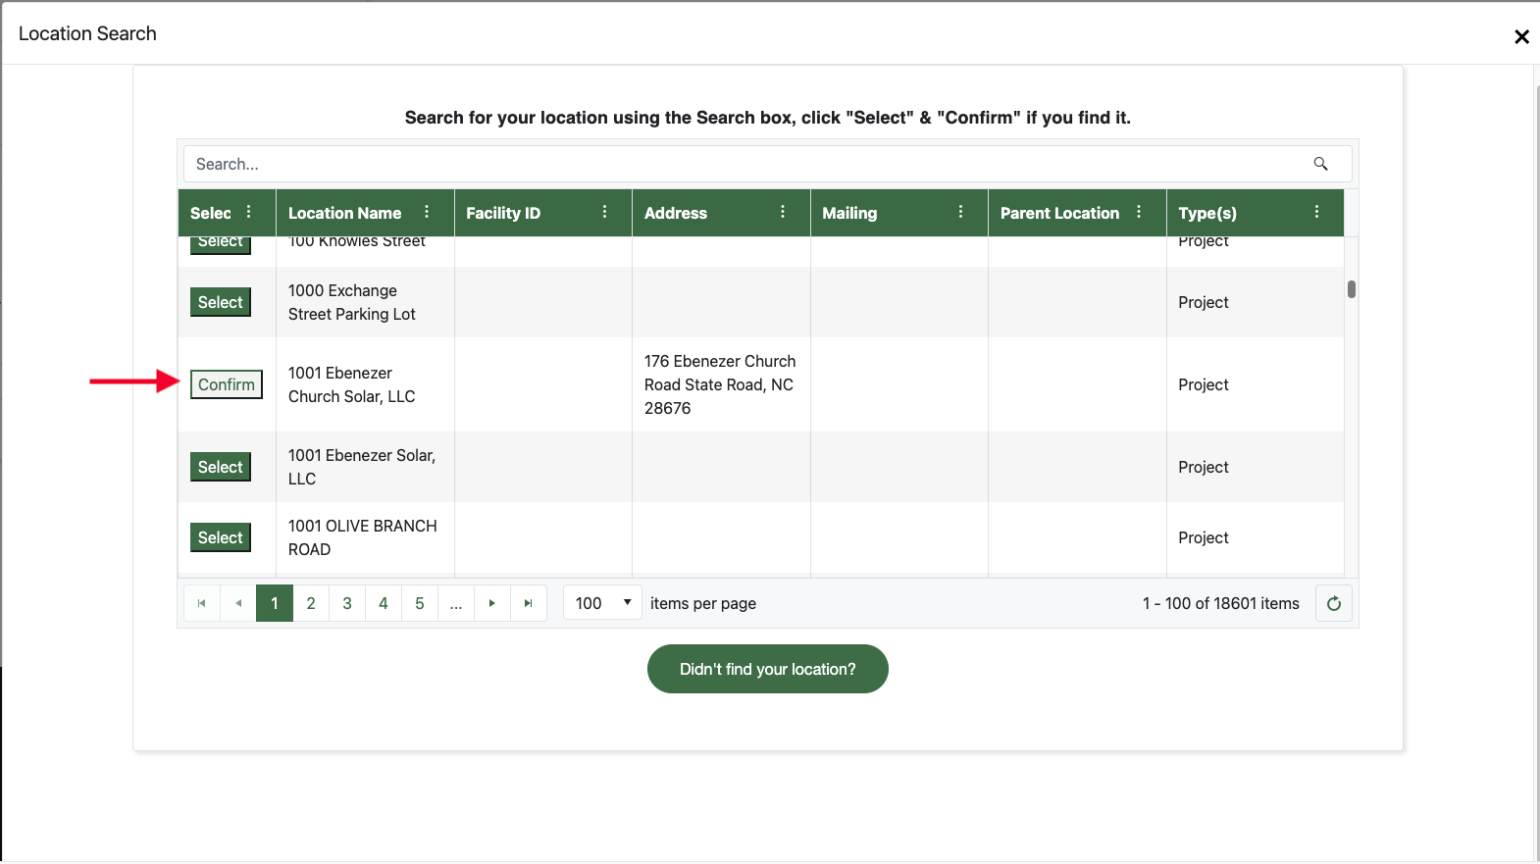
Select and Confirm the Location
If you find your site/facility/location, click the "Select" button, and then click the "Confirm" button again. If you don't find your location, click on the large green "Didn't find your location?" button at the bottom-center of the screen.
-
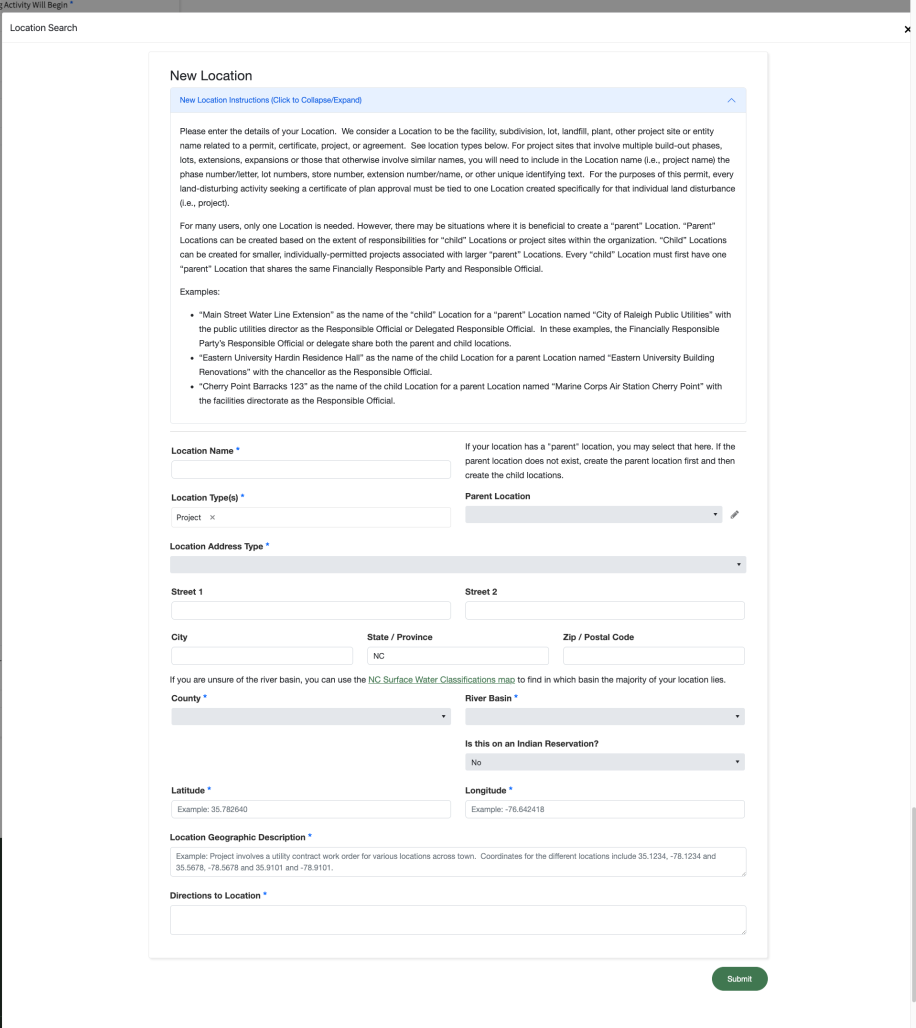
4
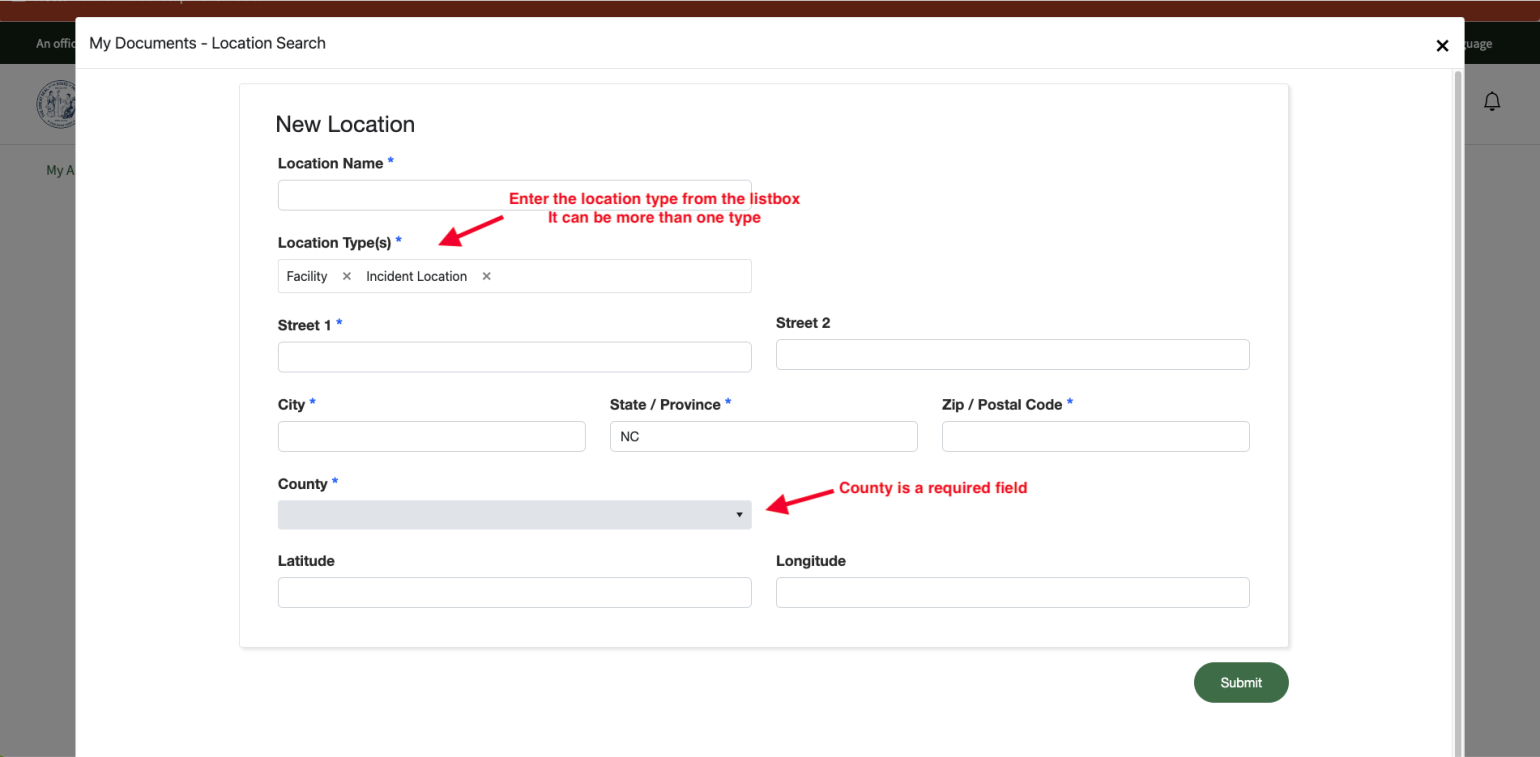
Enter Location Details
Fill in the required fields in the "Add Location" pop-up screen.
-
5
Choose Newly Added Location
Now go back to the Facility/Location/Site listbox and select your newly-entered location from the listbox.
Check out this YouTube video for more!
Notes
- Each program may use a slightly different "Add Location" detail screen. For example, the Erosion & Sediment Control" permit application uses a much more detailed location description because often there is no street address.
- Blue asterisks on field labels mean that that field is required.